An important part of the ma was to develop skills within film editing. A complete novice to the avenue of film editing, it has been developed with basic principles to hopefully develop deeper after the MA. Due to certain circumstances, a basic windows moviemaker has been used, but has been significant in the development of gaining understanding to movie editing. The idea of incorporating and developing skills within video was to gain a new skill while completing the masters program, through several video editing workshops and personal development with online software tutorials and a dedication of self persistence a basic principle knowledge of video editing has been achieved. Several video documentations were developed during the year as evidence and experimentation. From cutting and splicing to the manipulation of speed and sound tracks added to the video. The hope to progress with more advanced programs has proven be a success.
Premiere Workshop
Iain Finley
September 2006
An introduction to Adobe premiere and features available for editing movies.
There are 25 frames per second.
When filming allow the film to roll a bit longer as not to disrupt the time code which can be useful when capturing a lot of footage onto the system, it also allows for the set time code to be set within the program.
When setting up a new file create a new folder and allow each clip a name to be easy identifiable after capturing. Import footage through fire wire connection either manually or by time code appliances.
Before using the editing suite its best to collect the time codes of the clippings required and then upload the footage straight away rather than be selecting the footage while in the suite as time is precious.
Once the footage has been uploaded, drag and drop onto time line. The footage will appear on the screen, ready to be edited. Cut and splice the film, overlay , application of different effects may be applied to the film, by dragging and dropping.

Experimentation with Adobe premiere were developed with a range of still images taken from the video unknown and drawn images of consciousness continued, this created a stop motion animation, that altered in speed and duration during the edit, it also gave the possibility of working within the Premiere program.
30 October 2006
Nottingham Trent online Software Tutorials

30 October 2006
Video Editing Workshop
Open up the opening screen, create a new project setting,
The cadi's should be used for the saving of work.
Using make a note of what cadi is being used.
Start Premiere
New project setting a new window will appear with moving image use capture, this can be a digital capture and change the settings to the relevant source. click OK
A editing screen should open, it is best if the screen is moved to fit the layout, creating a main interface.
Connect the camera and start to capture the footage, the best way is to paper edit the film first.
To capture go to File - capture - move capture.
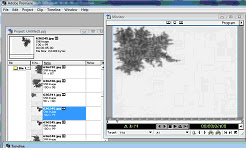
capture window
Change the capture location if necessary, find own file and turn the camera on, the buttons on the screen can control the camera actions.
Use the time code to edit the start and stop of the footage. with the time code a batch capture can take place, where times can be put within the computer for them to be automatically uploaded.
It is best if the clips are given a name that identify them, once they have been saved and named they will appear in the project window. Select and drag the clip onto the time line to start editing, by using the scrubber tool you can quickly view the footage, the footage can be layered to fade in and out of clips. to render just click enter.
Open up the opening screen, create a new project setting,
The cadi's should be used for the saving of work.
Using make a note of what cadi is being used.
Start Premiere
New project setting a new window will appear with moving image use capture, this can be a digital capture and change the settings to the relevant source. click OK
A editing screen should open, it is best if the screen is moved to fit the layout, creating a main interface.
Connect the camera and start to capture the footage, the best way is to paper edit the film first.
To capture go to File - capture - move capture.
capture window
Change the capture location if necessary, find own file and turn the camera on, the buttons on the screen can control the camera actions.
Use the time code to edit the start and stop of the footage. with the time code a batch capture can take place, where times can be put within the computer for them to be automatically uploaded.
It is best if the clips are given a name that identify them, once they have been saved and named they will appear in the project window. Select and drag the clip onto the time line to start editing, by using the scrubber tool you can quickly view the footage, the footage can be layered to fade in and out of clips. to render just click enter.


Unknown Editing

the first cocoon video was captured while trapped within a fabric sheet. the video footage resulted in a dark image and is very pixelated due to this.
the second recording was filmed with additional lighting this resulted in a a better quality image but lost the solemn appearance of the previous one.
Bloom Video Editing
While in Brussels, the camera were set up at the side of the room near the entrance, it was left on record to capture any activity that was taking place during the construction of the painting. The 3 hours of footage was long and at times boring, so to create a brief documentation of the event it has been edited down to around 7 minutes, during the editing the transition of long fades were applied to each clip, this was to create a dreamy illusion of how I remember the dream team creation in the room of the crown royal hotel.

The documentation filmed in Brussels for the bloom project was narrowed down from 3 hours 23 minutes to being just over 7 minutes, it was decided to have the film this length as to show the progression and the interaction as others entered the room, the long fades have allowed the piece to have a dream like quality.
One step beyond were added as the sound track to the film as with its uplifting beat it worked strongly next to the film footage, this also allowed experimentation in applying audio to the film, the sound from the recording were muted in some places and in others it was allowed to play through, as to show the piece wasn’t created in silence.
One step beyond were added as the sound track to the film as with its uplifting beat it worked strongly next to the film footage, this also allowed experimentation in applying audio to the film, the sound from the recording were muted in some places and in others it was allowed to play through, as to show the piece wasn’t created in silence.


As an experimentation into film editing it has given me the opportunity to develop with what may be applied to the edit and has produced a strong documentation of what happened during the development the painting.
Dripping Of Time


Windows Movie Maker online tutorials


Nothingness


week one at the playhouse saw the footage of nothingness beginning created, using a clipping out of the recorded documentation
week two was developed with a sound track that has been manipulated and layered
week three show a whole new video be developed through the recordings of television snow, a sound track was added to the video to create a development of evp and the process of the exhibition being transformed from one week to the next.
Consciousness Continued
Consciousness continued has developed through the interest gained during the editing of bloom and the possibility of changing the face appearance of the film footage. Initially it started as framing the hand within the screen and just having the effect of the drawn image being created, the footage were filmed on several occasions, through development of the first recording were to dark and the contrast did not work quite right. So with further development the footage were cut and spliced to remove all the faults of pixels and distortion that had occurred during the filming of the video.
The design package has been useful in forwarding my knowledge of video editing and what can be achieved through using effects.


The developed film were projected on to the mdf drawings and slowly removed by audience interaction, this allowed to that the projected image may only be rectangle unless manipulated during the edit of the footage, or if a stencil were applied to the projector to restrict the light.

The video editing were developed with a connection to the drawn images given away to the audience, the sketch effect were applied through the editing programme that is being used for the cut and splicing of the film. The programme has just been used a an aid to find and development the basic knowledge I have of film editing and find new ways of manipulating the film footage.

The film has been doubled in speed to allow the viewer to walk around the exhibition, having to walk back to see how the animation has progressed.